Knowledgeable Sales & Support
(800) 995 9965
Important: Please read and understand all installation and adhesive instructions prior to opening the adhesive cartridge.
CAUTION: Make sure your work area is well-ventillated and has air circulation. Adhesive is flammable, keep away from heat and flame. Please wear safety glasses and latex gloves. Avoid contact with eyes and skin. Read warning label on adhesive box. KEEP OUT OF REACH OF CHILDREN.
Note: When painting, the door and dentil shelf should be unfinished when applying dentil shelf. Door needs to be removed from the opening and placed in a horizontal position for a minimum of three hours to allow the adhesive to cure.
Tools Needed: Latex Gloves, Safety Glasses, Mineral Spirits, Soap and Water, Stir Stick, Bristle Brush and Disposable container for mixing.
Installation:
Step 1: Before You Start Protect the underside of the door by laying it flat on padded sawhorses or another padded surface. Position the door with the exterior side facing up. Thoroughly clean the door surface and the dentil shelf with soap and water. Be sure to thoroughly rinse with water to make sure all soap and residue are removed and then dry completely. Surfaces must be completely dry before going on to Step 2.
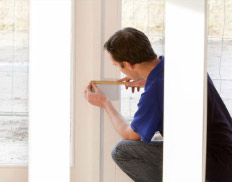
Step 2: Locate Shelf Position the dentil shelf on the door so that it's centered along the width of the door and parallel to the glass opening (suggested location is entered from bottom of glass frame and top of panel embossments). Use a graphite pencil to lightly mark the location of the top and sides of the shelf on the door face.)
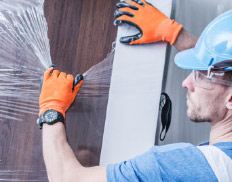
Step 3: Apply Adhesive Open adhesive cartridge as directed in the “DIRECTION FOR USE” instructions on the label of the adhesive cartridge. Dispense adhesive as instructed into a disposable container and mix thoroughly with a clean stir stick for sixty seconds. Using a bristle brush, apply a thin coat of adhesive to the underside of the shelf. Be careful not to allow adhesive on the sides of the shelf. The coating should not be more than 1/16” thick and should be approximately 1/2” away from all edges to help prevent squeeze-out. Carefully press the shelf onto the door face using your pencil lines (from Step 2) as your locating guides. Apply firm pressure to ensure contact with door. You will have approximately 3 to 4 minutes to work with the shelf before the adhesive starts to set. Immediately remove any adhesive squeeze-out with mineral spirits and a clean cloth.
STEP 4: Cure Time The shelf and door should remain in the horizontal position for a minimum of three hours to allow the adhesive to cure. After three hours, the door can be finished if painting or re-installed if staining. Full bond strength is reached at sixteen hours.
STEP 5: Adhesive Disposal Wipe tip clean, retract plunger slightly and close with the special cap. Allow the adhesive in the disposable container to harden in a well ventilated area. Once hardened, properly dispose of adhesive.
Source: plastpro
This learning center is a growing resource for home-owners and contractors who are looking for door and window replacement solutions.
The information here can empower you to make intelligent decisions for your unique situation. There are step by step video tutorials you can follow, Or get a recommended pre-approval installer.